Aluminum
Casting Scratch Mold Workshop
This is an opportunity for participants purchasing scratch molds to carve them, see them poured in aluminum, and keep the resulting hexagonal aluminum tile. The series of photos below show the process of making a tile.
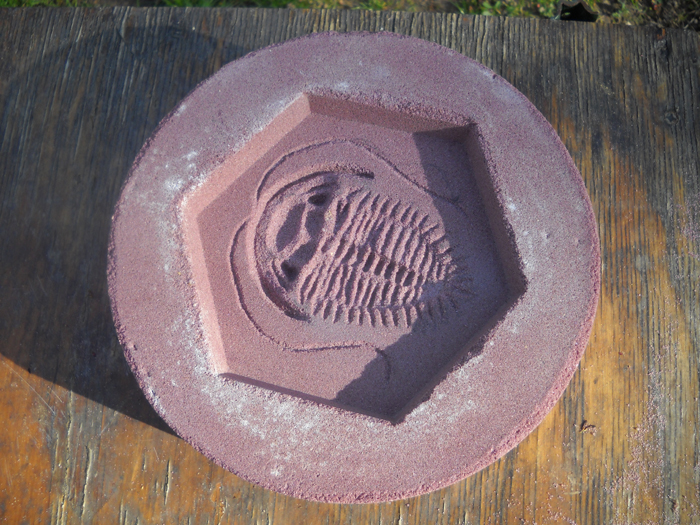
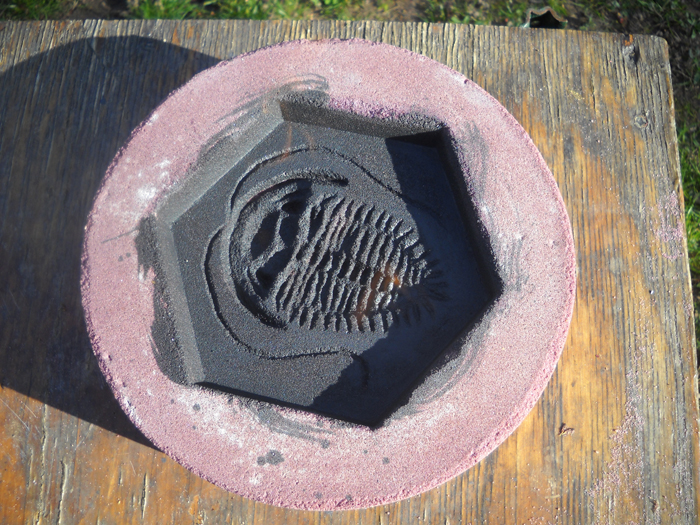
You would start with a sand mold that is a blank hexagon. The picture shows one of theses after I carved a trilobite into it. I did this with a spoon and the head and the tip of a screw. Participants purchasing a scratch mold would be able to carve it on site with various hand tools like these. The consistency of the mold is like soft sandstone.
After it’s carved, it is painted with an alcohol/graphite mix to make the finished piece smoother.

Then a cover and a pour cup are glued on with core paste.
Pouring the molds:
|
|
|
|
|
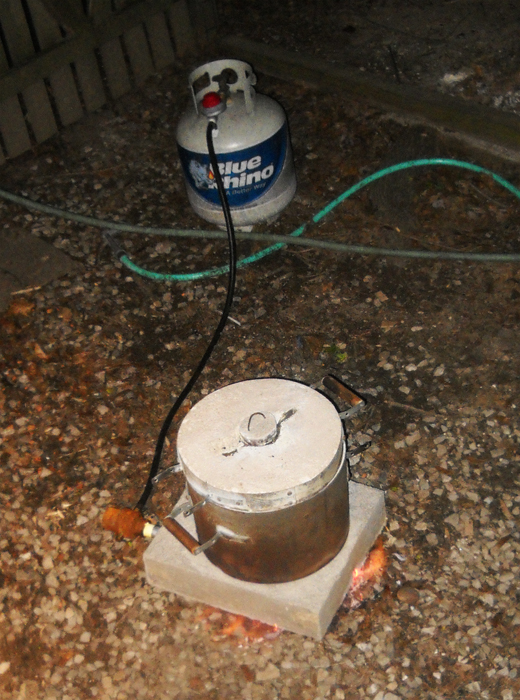
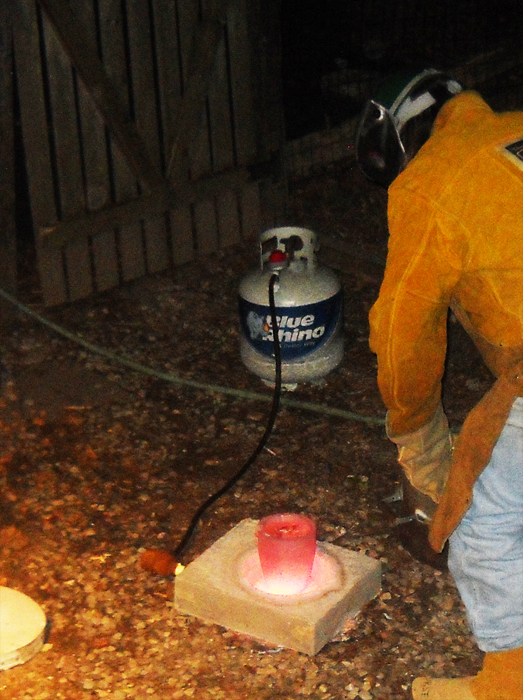
The furnace is started, and aluminum is melted. |
The body of the furnace is lifted off, and the crucible with molten aluminum is grasped with tongs. |
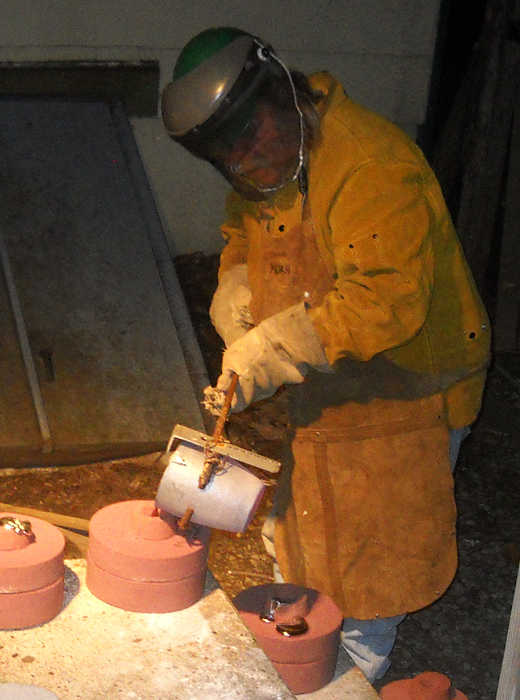
The aluminum is poured into the sand mold. |
The molds would be quenched in
water, and opened so the participant could see the result. I would cut off
the pour cup, and grind the cut flush. Depending on volume of
business, tiles poured on 10/6 would be available for pickup at
the end of the day on 10/6, or on 10/7, or could be mailed for
an additional charge. Those
poured on 10/7 would likely need to be mailed. Patina and sealer
would also be an option for mailed tiles. The basic cost of a
tile would be $40 - cutting off the pour cup and grinding
flashings is included. Shipping
charge would reflect shipping cost, so would be dependent upon
shipping address. Patina
and sealer would be $15.